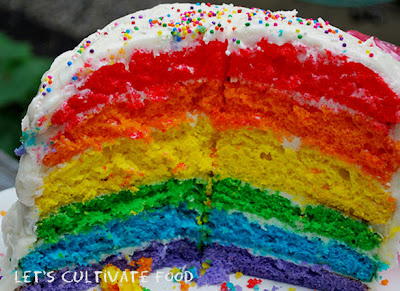
past 3 months. It's called Rainbow Cake for the simple reason of being a 6 layered cake with
colors of the rainbow. I'm not too much of a baker but there are a few cakes I really enjoy
to make but more importantly...EAT!
Flourless Decaf Espresso Chocolate Cake being one and the second new favorite is the Pumpple.
Making this cake takes a teeny bit longer than the normal cake but it's SO worth it. After your white/vanilla cake batter is ready... (2 boxes) you want to split your batter into 6 even amounts.
You want to start with the bottom layer first. Purple being the bottom layer of the cake.
Then you want to follow with the blue- followed by green, yellow, orange and then- lastly, red.
If you have more than 2 pans- try it all at once... be a rebel!
Once each layer is baked (you can stick a toothpick in the center and see if it comes out clean)
I take the sides of the pan out and throw each layer in the refrigerator.
As I start the 2nd batch of the next 2 colors- and clear the counter area a little bit-
it's already time to take the first ones out from the refrigerator.
(as they are chilled it becomes way more convenient to take off the bottom of the pan.
I start with carefully centering the purple layer on the middle of the plate.
Then I add a little icing followed by the blue layer, than more icing etc... for all 6 layers.
I think I might try to alternate red and green for the next one....


