November 13, 2013

Buffalo Cauliflower Pizza

Pizza... ah, the all American food.... not the 'hot pocket'  right? 
Just an inside joke among the In-Home Class students. 
The number of pizzas eaten just in the United States alone are so high... 
I don't even want to get into the numbers.

Think about it. 
How many pizzas did you eat as a kid, how many birthday pizza parties did you attend?
Pizzas are eaten after many sports games and practices. Remember in high school
eating pizza while working on school projects... and of course the pizzas you ate
with friends in college til the sun came up? 
As adults we still order pizza with co-workers to eat while finishing a project
to make the deadline.

Here is a twist on the average pizza.  
I'd like to share my creation of Buffalo cauliflower pizza with lemon zest.

I know, I know. You're thinking... cauliflower? 
Who eats cauliflower... let alone on a pizza?

You know that saying "don't judge a book by it's cover?"
Well,.............   don't judge a food without tasting it!.    :)


I took 1 cup of all purpose flour and 1 packet of yeast.
I mixed in 1/2 coffee mug of hot water. (microwaved it for 1 minute)
I took a spoon and mixed it together and then let the dough sit
for a minimum of 30 minutes.

While the  dough is rising and doing it's  "thang"

Take some water and blanch the cauliflower.
(Don't overcook the cauliflower especially because you want a little bite to it
and it's going to go back into the oven.

After 30 minutes or so- roll out your dough
and drizzle some olive oil, coarse sea salt and squeeze the juice of half a lemon.
Do this to both sides and  cook the dough on an outside grill for the best taste.
If you don't have an outside grill-  the next best option is to 'broil' it in the oven
on the top rack.  Also- if you have a cookie rack- it's best cooked on there as well
so that the bottom of the pizza gets cooked as well.
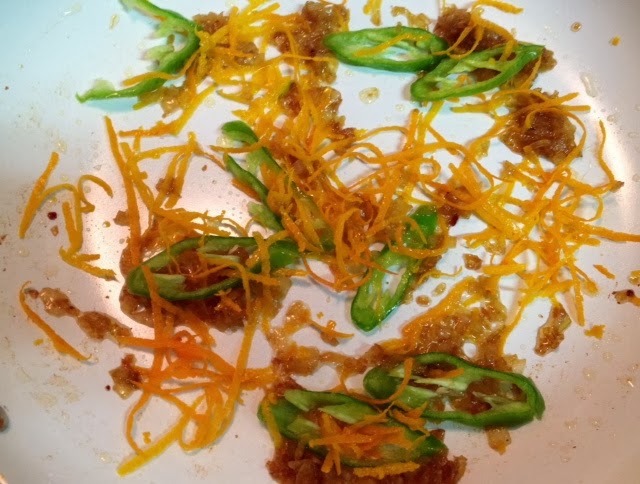
While your dough is cooking-  take some  "Frank's" hot sauce
and coat a saute pan with the hot sauce and equal parts of butter.
Once the butter melts, take you chopped scallion and add that to the sauce
along with the cauliflower that's already cooked a little.

Once your dough is brown and toasty, take it out and add
another drizzle of olive oil, some shredded cheddar cheese, then the buffalo cauliflower
then some shredded mozzarella cheese followed by zesting one lemon and squeezing
the remaining juice of the other half of your lemon.

Throw it back in the oven for up to 7 minutes (or until the cheese melts)

I will guarantee that this pizza will be a new favorite.
Even if you are a meat loving pizza eater!

I wish I could make this pizza for all of you!
It's really something special.
The lemon really blends everything together so well giving it a fresh delicious taste.

Ingredients:
1 cup all purpose flour
1 packet of yeast
1/2 coffee mug of water
1 lemon (for juice and the zest)
1/4 of a cauliflower
2 whole scallions
1/4 cup Frank's Hot sauce
1/2 stick of butter
sprinkle of sea salt
handful of shredded cheddar cheese
handful of shredded mozzarella cheese


Zestfully, Let's Cultivate Food

In Home Cooking Class Philadelphia        Birthday gift present activity cooking class

November 6, 2013

Calling foodies for "FRANKENFOOD"

Calling all foodies!
I was personally notified by Whitney @ Sharp Entertainment to let
all foodies know about Frankenfood.
Frankenfood is a tv show on the Spike network.  They are casting people in many cities--
Philly being one of them. Share an innovative and revolutionary food creation with them
and get an opportunity to win some cash as well!

The winning dish will be featured on a restaurant menu.

" "Frankenfood," is a  brand new food competition series airing on the SPIKE network. It's a very exciting show that will follow celebrity chef Josh Capon as he travels the US searching for the most creative and innovative dishes.  Each episode one contestant will win $10,000 and have their unique winning dish featured on a restaurant menu!"

please let me know if you want more detailed info! .......... letscultivate@gmail.com


November 5, 2013

PUMPPLE = pumpkin + apple

Have you ever been to the Reading Terminal Market in Philly?
If you've never been... it's located on 12th and Arch Street near
the PA Convention Center.

There is a place called the Flying Monkey Bakery that makes this
cake pie called the Pumpple.  Pumpple = Pumpkin + Apple.
Now, It is not your typical cake or pie. It's a pie cake or shall we call it cake pie?
It's almost  like 4 in one.  It takes them 3 whole days to make it from  scratch.
The standard 9 inch diameter cake is about 15 pounds.
Yes, I did say fifteen POUNDS.
There are 1800 calories (12 slices) and  it costs $75.

It's the MOTHER of all cakes and pies.  So, when I came near one...
instead of saying... no, I don't want to try that or shouldn't really eat that...
I said,......... I'm SO making that at home. Go figure!
(I also did say... there's no way I'm paying $75 for a cake.....
sorry Flying Monkey)


So, this is my semi-homemade version.  This Pumpple- by the way is
COMPLETELY sugar free. The basic make up of the Pumpple is 2 layers of cake.
The bottom layer being a chocolate cake with an already baked pumpkin pie
in the center and the 2nd layer being a vanilla layer with an already baked apple pie
in the middle.  It really is 2 cakes + 2 pies, 4-all in one.

So, thanks to Pillsbury's sugar free cake mixes, sugar free icings and Acme's sugar
free apple and pumpkin pies, they took out all the hard work for me!


I started by getting my 2 cake batters ready with water, oil and eggs.
Easy enough. I then carefully took out my sugar free pies I purchased from
the bakery at Acme. I started with greasing the bottom of my pan and then
added some chocolate cake batter.


I then laid the pumpkin pie on top of about a 1/3 or so of the batter.
Once the pie was carefully laid... I took the rest of the chocolate batter
and completely covered the pumpkin pie.


I did the same thing with the vanilla cake batter and sugar free apple pie.
Once they were cooked at about 325-350 degrees for 40-50 minutes....
I took them out to cool.


I did wait a while for them to cool and actually chilled them in the
refrigerator overnight. Once I was ready, I began to ice the bottom chocolate layer
first with Pillsbury sugar free icing.


THEN- I CAREFULLY took the chilled vanilla cake (with apple pie inside)
and placed it on top. The original Pumpple at the Flying Monkey uses a home made
layer of butter cream frosting that is about 1.5-2 inches high in between the 2 layers.
I might be ambitious but... had to go a little easy somewhere right...? haha


The hardest part is getting the second layer of cake to lay on top without it going....
PHALT! Once you're ready you can ice the whole entire cake.
It took me a can and a half to ice this cake.


The second to last thing and maybe most fun thing about the Pumpple is to decorate it.
I actually had the same leaf decorations and round jimmies that the bakery
seemed to use. And then of course the BEST thing is to cut it, and eat it.
It REALLY is REALLY good. The chocolate is very yummy with the pumpkin pie and
the apple pie really goes well with the vanilla cake- just like the way apple pie
is good with vanilla ice cream!
This MIGHT be dessert for Thanksgiving this year.....
and of course some jello wedges.


Zestfully Let's Cultivate Food

October 1, 2013

Apple Cinnamon Mint infused green tea - updated

Fruit and herb infused drinks are the BEST!
Water is the absolute best but, infused waters
and teas are what often help make
a meal or snack twice as good!

I'm known to infuse all kinds of things in water and teas.
from basil to black pepper corns, to fruit rinds to star anise to
the typical citrus fruits, berries, rosemary, tarragon, spearmint, mint etc...

When I think of the season of Fall aka: Autumn--
I think of apples then pumpkins.


In many of my cooking classes I remind people of how we eat
the same basic things over and over and over again.
We get into a rut with many things; exercise, tv shows,
but most often with food... I guess because we eat more than once a day..?.

I like to use  green tea as a base in many infused tea drinks.
start with brewing 8-10 green tea bags (to make a pitcher)
Add a sweetener (sugar, agave, honey, splenda... whatever floats your boat)
add one apple diced, 4-5 whole cinnamon sticks and and a few mint leaves.
I usually add 4-5 whole stems.  The whole stem with the leaves.

This refreshing drink is the perfect Fall drink or any season!


Zestfully, Let's Cultivate Food

In Home Cooking Class Philadelphia        Birthday gift present activity cooking class

September 30, 2013

Orange Beef

Orange Beef.  One of my favorite. It's a Chinese-American dish that is of Hunan origin.
I love all things citrus. lemons, limes, tangerines, grapefruit and of course oranges.

Have you ever added a slice or 2 of an orange wedge to your coffee?
Hot or iced ... it's brings a great hint of orange flavor to your coffee....
ok, sorry I got side tracked with coffee...
where were we- ah, orange beef.


Because the beef gets deep fried- you want a cut of beef that doesn't 
have too much fat in it. If it has too much fat attached- it will get soggy quicker
and not stay as crispy- the way you want for this specific dish. 
(You can use flank or sirloin - 2 common cuts any supermarket will have)


Once you slice your beef into strips 
(if it's hard to slice- it's often 1 of 2 things, your knife needs sharpening or the beef needs 
to be firmer and an easy way to do that is tho place it in the freezer for a few minutes
to firm it up)  ---you want to coat your beef slices with corn starch. Lay them on a 
cookie rack and the trick to this is to place it in the freezer for at least 20 minutes. 
The longer the better-- it will allow the cornstarch to stick better and having the 
beef firm will fry it better helping with the crispness.


This is orange beef so you want some orange peels or orange zest. I like it with the 
colorful strands of orange zest peel.  You can simply just peel a few pieces otherwise.


This is the beef after it has been deep fried. Once it's on a paper towel to catch 
the excess oil from  deep frying- you can add a sprinkle of salt on the beef 
(preferably when it's still hot)


Make your sauce and set it aside so it's ready to pour in after sauteing the wanted veggies.


Saute half of the orange peels/zest with one jalapeno pepper in a frying/saute pan
with a drizzle of oil (veggie, corn, canola, peanut or grape seed)
(This is not a plate- it's actually a new ceramic coated frying pan)
You want to add in the green veggies next and once those are sauteed to your liking--
add the sauce and let it simmer (about 7 minutes)
( I used broccoli and green beans- simply broccoli because it's not a sweet green
veggie and the sauce for this dish is sweeter than not and the green beans
because I simply had them on hand.

Lastly, add your sauce to the veggies and as it simmers- add in your equal parts 
of corn starch and warm water mixture to thicken up the sauce. 
(If you use cold water- the sauce will break apart and lose the thickness very quickly 
and if you use hot water- it will literally cook the cornstarch making it lumpy)  
Once your sauce has thickened- turn your stove off and add the fried beef.  
This dish along with any stir-fry dish is best with a side of rice.


Tossing the orange zest on top along with a little chopped scallions give the dish a nice
garnish... if you're into that. :)    I suppose you could add a sprinkle of sesame seeds
if you really wanted especially since this sauce has a little sesame oil in it.


The recipe is as follows: 
1.5 pounds of any beef that has a low fat content. (sirloin or flank works well)
3 TBSP soy sauce
6 TBSP of cornstarch
1 large orange or 2 medium ones (clean skin for zesting)
3 TBSP molasses
1 TBSP rice vinegar
1.5 tsp sesame oil
1 jalapeno sliced thin on a diagonal (seeds taken out if you don't want super spicy)
3 garlic cloves minced
1 tsp fresh grated ginger
1/2 tsp red pepper flakes OR 2 tsp of Korean red pepper powder flakes
2 scallions (optional- chopped for garnish)
sprinkle of sesame seeds (optional for garnish)


Zestfully, Let's Cultivate Food
In Home Cooking Classes Philadelphia        Birthday gift present activity cooking class


September 27, 2013

Pierogies - the Polish Dumpling

Dumplings, dumplings and MORE dumplings!

I love dumplings. We do many traditional Asian and Asian Fusion style
dumplings in our classes but we also do some modernized ones along with
non Asian dumplings as well.

Pierogies can easily be made at home using the same wrappers for
the typical Asian style dumplings. They are a little on the thin side but because
I always have dumpling wrappers on hand--- and what's better than double duty...
actually in this case maybe 16th-duty... we have 16 different types of
dumplings as of 2 weeks ago.

Here are a few just to give you an idea--
shrimp and pork,   pork and ginger,   chicken and chives,   buffalo chicken with bacon,
tofu with vermicelli,  tofu and kimchi,  kimchi and chives,  apple and banana,
shrimp and lobster,   veggie samosa,  beef and veggie,  veggie,

For these really easy home-made pierogies-
I took one potato, diced it up and boiled it in salt water. (1 teaspoon of water)
while the potato was boiling away- I diced up one small onion and sauteed it
with a drizzle of soy sauce (you can use a sprinkle of salt instead of
the soy sauce if you prefer) (soy sauce is soy beans that are fermented in lots
and lots of salt)  Once the potatoes are soft (if you take a fork and it pierces
very easily- they are ready to mash!) Mix the onions and potatoes with any other
herb you'd like- if you'd like.
Add the filling and fold the wrappers in half by gluing the sides together 
in egg white wash.

When you have a few done- turn your saute pan on with a drizzle of
oil (corn, canola, peanut , veggie or grape seed) and fry them.
You will most likely have to fry them in a few batches if you decide to make
the whole mix.  The best way to eat these home-made pierogies
is to drizzle (if your sauce is in a squeeze bottle) or dip in BBQ sauce.
I really like Kraft BBQ sauce... but use whatever kind you like of course!


pictures- pre BBQ sauce. 

Zestfully, Let's Cultivate Food


September 26, 2013

I was in a local paper today.... pretty cool.
This certainly doesn't happen to me everyday...

below is the link for the article!

     http://chestnuthilllocal.com/blog/2013/09/26/asian-fusion-is-magic-for-popular-malt-instructor/


In Home Cooking Class Philadelphia        Birthday gift present activity cooking class